Check It Out!!

Showing posts with label paint. Show all posts

Tuesday, September 13, 2011

Can You Help a Girl Out???

I am woefully bored with my current Pandora music channels.  The only time I listen to Pandora is in my crafting room and I'm afraid the repetition of the same old music is affecting my crafty mojo! 

Can you help a girl out and give me some suggestions for channels with upbeat, rockin good music??  I want to WANT to get up and dance around while I'm making stuff.  I want my head to bob.  I want to sing along at the top of my lungs.  (Luckily I'm usually home alone when this is going on, lol.)

And even if you don't listen to Pandora, just tell me some of your fave crafting music.  I can still get ideas from that. 

I'm thinking maybe I should clarify my "kind" of music, too.  I was recently asked if I was DJ Jazzy Jeff and I had to come up with my Top 5 list of rock the house songs what would they be and I answered:

One Step Beyond by Madness

Boom Boom Pow by Black Eyed Peas

Freedom! '90 by George Michael

I'm Not Okay (I Promise) by My Chemical Romance

Vasoline by Stone Temple Pilots


So, can you help a girl out?  I'll trade you a card for your suggestions.  ;0D

Originally published in Scrapbook News and Review June 2011

This one is chock full of yummy painty techniques and I love the way it came out. 

OK, back to my craft room with my same ol' same ol' music.  LOL!

♥Heidi

Thursday, July 21, 2011

So Excited

Supplies Cardstock: Best Occasions; Alpha Stickers: American Crafts; Stamps: EK Success, Glitz Design, Studio Calico; Ink: Stampin Up; Paint: Making Memories, Plaid; Pens: Faber-Castell, Sakura; Other: Drywall Tape, Playdoh container, tape

Today is the first day of school for my kids!  Specifically, it's the first day of Kindergarten for my daughter!  Big kid school.  She's so excited.  We went to meet her teacher and explore her classroom on Monday.  Yesterday we got all her school supplies ready (water bottle, backpack and lunchbox - isn't that owl the cutest lunchbox ever??!!) and she did a dry run trying on her first-day-of-school outfit. 

Had bunches of fun playing with paint and ink.


This layout is inspired by a digital ATC made by Katherine Hansen, a fellow Scrapbook News and Review staffer, and uses the sketch I made for this week's Sketchy Thursdays challenge. 


Come play along with us this week!  Our sponsor is October Afternoon!!!!

I'm off to almost FOUR hours of uninterrupted playtime in my scraproom. 

Bliss. 

♥Heidi

Friday, March 18, 2011

Life is Good

This is a bittersweet post for me.  I've got two Precocious Paper projects to share which I LOVE but sadly, these are my last PP projects as a member of her DT.  I'm so bummed to be saying goodbye to my DT term.  :o(  It has been an honor and great fun!!!  I will definitley continue to include PP products on my projects, of course, as they're definitely some of my favorite flowers out there!


Supplies Cardstock: Stampin' Up!; Patterned Paper: 7Gypsies, My Minds Eye; Brads: My Minds Eye; Chipboard: Colorbok; Flowers: Precocious Paper; Sticker: SRM Stickers; Pen: Zig

I absolutely love the Precocious Paper Rolled Fabric Flowers.  They come in two sizes and are just so elegant.  Here I topped a trio of smaller ones with some pretty patterned brads. 

Something I discovered about the ivory rolled fabric flowers (which I'm sure also goes for the white and any of the lighter colored ones) is they accept glitter mist beautifully!


I wasn't sure it was going to work...I trepidatiously sprayed this one thinking if I screwed it up I was going to be seriously bummed since I only had 2 to work with.  I thought maybe, since the fabric was so shimmery and slick-looking that the mist might just bead up on it or unevenly soak in.  Very happily the fabric accepted the mist perfectly. 

When I set out to make this next piece I dove into it with just this gorgeous misted flower and a poem composed by my 5-year-old daughter for inspiration.  Let me tell you, those were some amazing inspiration as I am so proud of this piece.

Supplies Flower: Precocious Paper; Ribbon: Michaels; Tape: Advantus; Stamp: Delish Designs; Ink: Ranger Industries, Tsukineko; Paint: Delta, Making Memories, Plaid; Glitter Glue: Ranger Industries; Ink Mist: Maya Road, Tattered Angels, Tsukineko; Pen: Sharpie; Charcoal Pencil: General's; Oil Pastels: Pentel; Tool: Stampin' Up!; Poem: "The Flower Grows and Grows" by Kinsey Myers; Other: chipboard, drywall tape, staples


The thing I think I'm most impressed with myself on this is that the mix of paints I used on her eyes is almost exactly the color of my daughter's eyes!  I call her "Rootbeer Eyes" because their color reminds me of a backlit rootbeer barrel candy. 

It's so hard to photograph anything shimmery.  This picture doesn't do the flower or the metallic, shimmery copper color in her hair or eyes justice. 
So, one day last month on the way to school my daughter recited a poem for me.  I asked if she'd learned it in school.  She said no, she'd just made it up.  And then she kept reciting it over and over.  She even said it for her class.  Of course, I had to write it down and I've been planning to commemorate it on a layout ever since.  Today, instead, a painting seemed more in order.


The poem begins in the middle of the flower, sprials out of it and down the stem with the "composed by" and the date sprialling through the leaf. 

I put in a seed
It started to grow
It grew a flower
On top of its nose
It started to smile
Full of glee
Happily

Isn't that adorable??!!!!!   My budding poet!  I love the way every line didn't have to have the same number of syllables. 

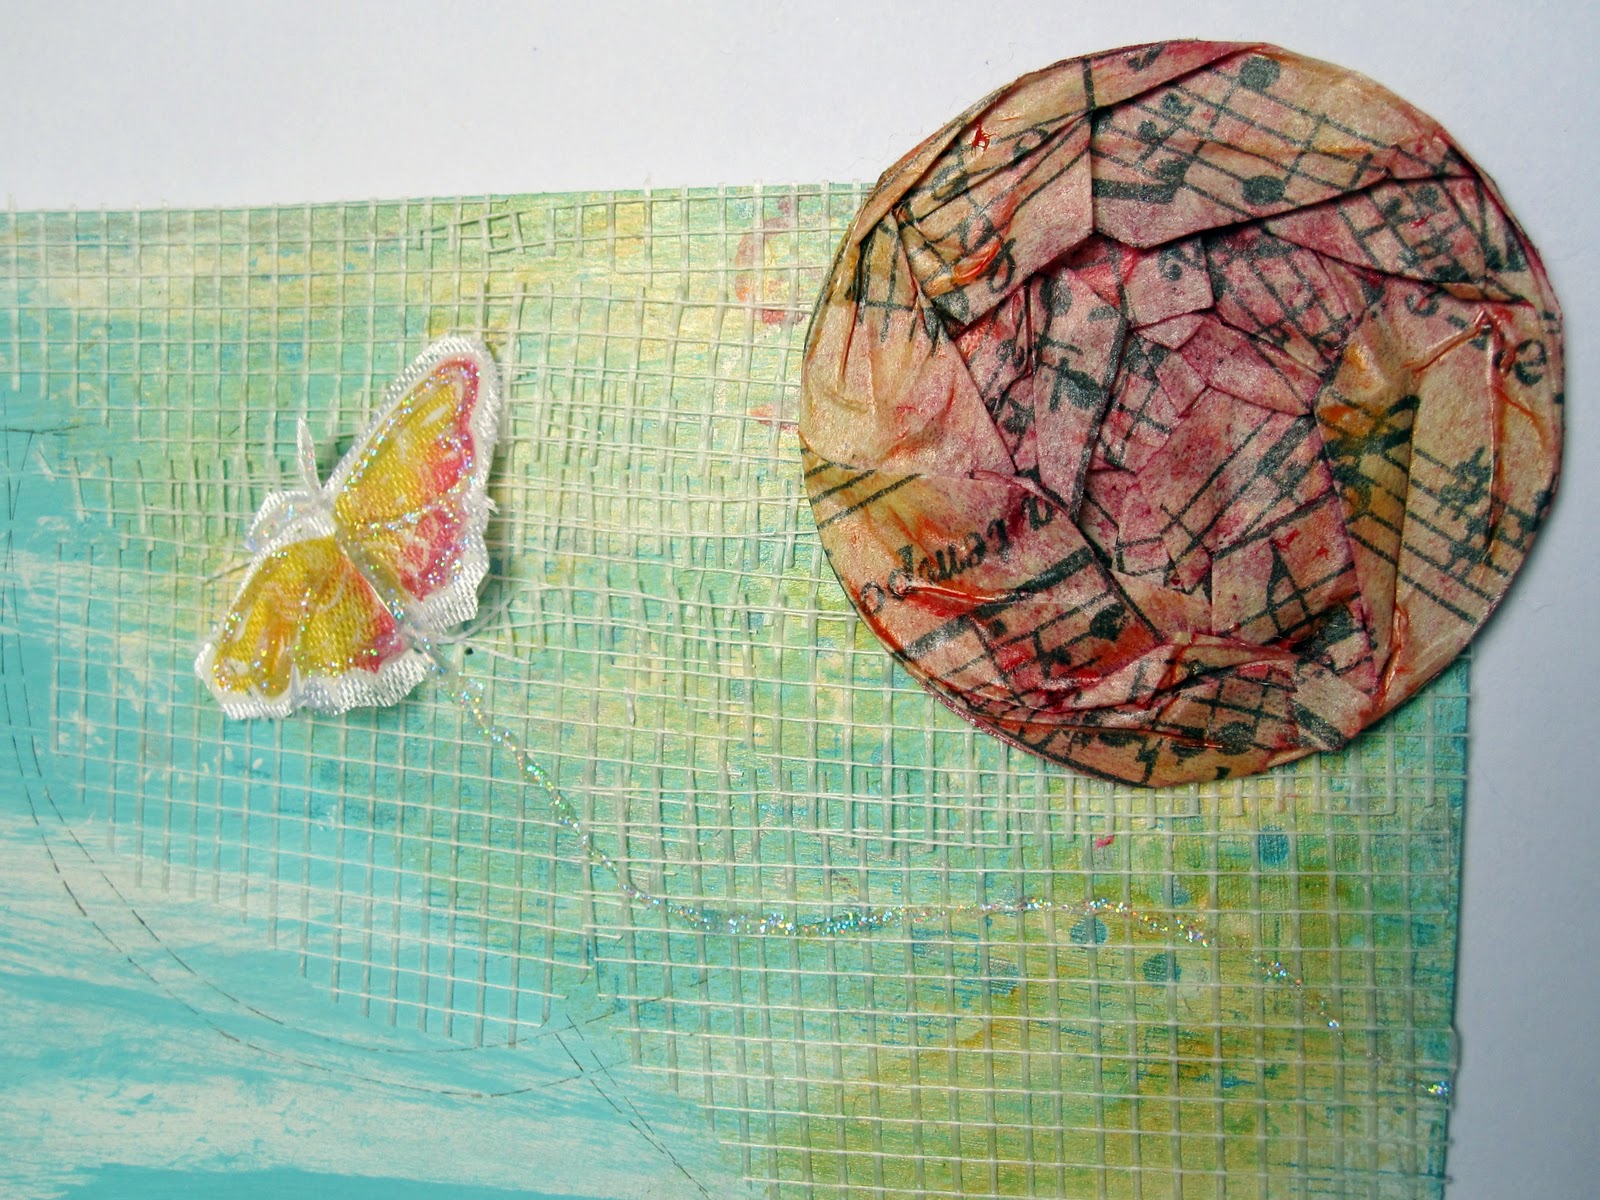
To finish off the page I attempted to make an interpretive sun out of spiraled misted Tim Holtz tissue tape and clouds of drywall tape. 


The butterfly is cut out of some spring-themed ribbon. 

I hope you enjoy this as much as I loved making it.  I don't paint often and don't consider myself a painter by any stretch of the imagination but I really had a great time doing this piece.  I guess I just need awesome inspiration first.  Now I've just got to find a frame for it and it's going to go live in my daughter's room. 

Be sure to check out the Precocious Paper blog for lots more yummy, flowery inspiration from her talented DT.   I can't wait to see who will be on the next team.

Hopefully you guys are cooler than we are this week.  It got up to 91 yesterday.  (Not sure what today was but it felt even worse.)  If it were May, or even April, I would've given in and clicked on that A/C so fast but there's something about it being only March that I refuse to on principle.  Even for here that's 15 degrees warmer than normal.  It's supposed to go back to the "normal" range next week.  I'll believe it when I feel it. 

♥Heidi

Sunday, September 5, 2010

Welcome SNR Readers!!!!

Hi there! 

Thanks for stopping by!!  Welcome to all who arrived here by way of Scrapbook News and Review

For those of you who may be new here, I'm Heidi.  I'm a papercraftaholic.  I don't purport to be particularly good at it, but I love it and try my hand at anything I can!!!!  I'm mainly a scrapper but an occassional card sneaks in there and lately I'm really getting into art journaling.  

So, today, I thought I'd share one of my newest technique obsessions: gesso/paint transfers.  What's that, you say?  It's the process of transferring a picture - usually a photocopy - into gesso or paint. 

You need to use a photocopy, or if you are lucky enough to have one, a laser printed copy of the picture you want to use.  This technique doesn't work very well with ink jet printers because it's the powder from the toner used in copy machines and laser printers that transfers into your gesso. 


Closely crop your photo so as little of the white paper will show as possible.  If you have a clearly defined edge on your picture go ahead and cut it out.  If not, as is the case with my camera pictures, I like to tear the picture out which gives any white paper surrounding your picture more of a feathered edge.  (Note: Your picture will be reversed when doing the transfer so if you have any text in your picture, print it reversed.)


Next, paint your base with gesso (or paint) and immediately lay your picture onto the gesso.  Make sure you have complete contact between your picture and the gesso, smoothing out any air bubbles with your fingers.  Allow your gesso to completely dry, at least a few hours but it's best if you can leave it alone overnight. 


After the gesso has dried, saturate the photocopy with water.  I have a little spray bottle I use for this.  Once saturated, use your finger to rub off the paper.  Keep rubbing and re-saturating with water until most of the paper has rubbed off.  I say most because if you rub too hard you run the risk of rubbing your image off. 

And voila, your image has been transferred into your gesso.


I made this for a set of mini canvasses I'm making of various vintage camera images. 

You can then paint and embellish as desired.


This is still a work in process - I'll share when I have them all finished!


I also recently used this technique on a layout I made for my friend and Pink Ninja Master Ally's birthday. 


Does this woman not have the most beautiful eyes or what?  (Or eye in this case, lol.) 


I transferred the image of her eye directly into the paint on the paper.


As you can see, I rubbed just a tad too much in one spot but I think it lends to the overall effect. 

I also used the gesso transfer on the junque journal I recently shared.


I hope you enjoyed my quick mini tutorial on gesso transfers.  I feel so lucky to be a staffer for Scrapbook News and Review because you can find lots of these types of tutorials and projects in the pages of the magazine every month.  And there's always lots of discussion on the forum about techniques and ideas, too.

Thanks for stopping by!  I hope to see you again!

- Heidi

Wednesday, August 4, 2010

Mine! Mine! Mine!


The newest Pink Ninjas prompt is "Selfish". 

As you may know, I've been having a great time over the last month or so taking a couple paint technique classes (Big Picture Scrapbooking @ Home with Claudine Hellmuth & a class at my LSS with Bethany Kartchner).  I'm nearing the end of my trusty sketch book and thought how fun to make another using paint and this prompt since the sketch book is just creative ideas for me. 

I LOVE the way this came out.  It's so touchable, too.  Lots of texture within the paint.


Can you see the relief?  I just want to run my fingers over it.


I decided to call this my "Junque Journal".  I was inspired by the one Bethany Kartchner made.


Even the title is all touchy-feely with Tim Holtz distressed Stickles.


I had to include a paint transfer.  I am so in love with this technique.  It's so cool to take any image and make it part of the paint. 


And here it is, in its entirety.  Can you see the two masks I used, too, sprayed with mist?  There's a giant old-fashioned looking clock near the title and stars at the top.

This journal is made out of one of those black and white composition books.  Can't beat that with all the back-to-school sales right now!  I think it was 50 cents.  I bought a bunch.

I plan to fill this baby with sketches, prompts, colors, clippings, and varied ephemera I want to incorporate into my projects.

Check out what the rest of the Pink Ninjas made for the "Selfish" prompt.  We all had a great time playing. 

Why don't you show us how you're selfish?

Ingredients:  Making Memories paint; Maya & Glimmer Mist; Tim Holtz & Crafter's Workshop masks; Heidi Swapp chipboard alpha; Cosmo Cricket Tiny Alpha; 7Gypsies stamp; Tim Holtz Distressed Stickles; Dymo labeler; Target $1 Spot flair; Michaels ribbon; nest image from Claudine Hellmuth; Elmer's glue; gesso; composition book.


Monday, August 2, 2010

Poe & Sunshine

Is it already August??!!!  Didn't we just start this year?  I always look at my son's birthday as the official start to the holiday season because it's non-stop birthdays, vacations, and holidays from there until January.  His birthday is just a little over a month away!  Aaaaaagh!!!!!!

OK, I'm a little slow on these two layouts.  Both went live yesterday, 8/1. 

The current Scrap That Poetry poem is "Annabel Lee" by Edgar Allen Poe.  Such a beautiful poem of love.  My mom requested I create something special for my step-brother and his wife and this is what I came up with, using a picture from their wedding:


The frame is a crochet hoop.  I got the idea for this from the Big Picture Scrapbooking Claudine Hellmuth class I'm taking.  The coolest part...the background fabric...


It began life as some Prima patterned paper!!!!!  I transferred it to some of Claudine Hellmuth's sticky back canvas!!!!


As you can see, it lost a little brightness of color but still!!!  It's so cool, right?  I have so many more ideas for this technique!!!!

If you're familiar with the poem "Annabel Lee" you know it's quite a long one so I only extracted one part for this hanging.  And I took a little bit of creative license with it and changed it slightly.  The original line was, "Can ever dissever my soul from the soul, Of the beautiful Annabel Lee."  Well, of course neither of my subject's names were Annabel Lee (how incovenient, lol!) so I changed it to, "Can ever dissever my soul from thee."  Hey, it rhymes, right?  Hope Mr. Poe doesn't cringe!


I filled in the bookplate with a crackle medium to further the antique-iness of the piece.

Actually, truth be told I futzed with a couple things on this piece.  I cut and pasted the Prima pearl flourish to fit within the circle. And although I had the Jenni Bowlin cardstock butterflies on hand, I liked the pattern on the Prima packaging better for this piece so I traced the Jenni Bowlin butterfly and added my own pearls. 

One other thing I did on this piece that you can't see on the pictures is I painted on their pictures with acrylic paint.  I painted their cheeks, lips, and hair.  I also painted all her jewelry with pearlized paint. 

Being the first of the month,  I also have a Category Stories layout for you, too.  This month's prompt is "_________ is my sunshine."


I incorporated techniques from both the Claudine Hellmuth class AND a class I took last weekend at my LSS with Bethany Kartchner into this.  (BTW, I am so stinkin proud of the mini book I made in Bethany's class and will be sharing that just as soon as I get it filled with some pictures - which will hopefully be asap.)  I am star-struck at having met and played along with Bethany in person.  This woman is ooooooooozing creativity.  I've already signed up for her next class at my LSS which is an art journaling class (with my other amazingly creative friend, Julie, who imparted that she's a bit trepidatious about art journaling but I know she'll make something completely fabulous!).  If you happen to be in the Mesa, AZ area on 8/28, sign up for this class!  It's going to be so much messy fun!  Oh, you should've seen me in the class last week.  I was COVERED with paint...ask Julie.  I am NOT prissy when it comes to paint.  I think it's usually much easier applied by hand. 

First, the picture of my little rays of sunshine is a packing tape transfer (which is indirectly a techinique I learned from Claudine Hellmuth...I already knew the basics of the technique but refined it with her tips). 

~picture detail~
Bethany's class was all about getting messy with paint, mists, and oil pastels and I incorporated all three here!  The sun rays are misted and then accented with oil pastels. 

The sky is a faux woodgrain paint technique that gives a great streaky effect.  I also misted a bit in the sky, too, and topped it off with some painted clouds using a Heidi Swapp mask (which, truthfully, I wish I hadn't done but oh, well). 

The butterfly and alpha silhouettes are created with Heidi Swapp masks and oil pastels. 

~title detail~


Finally, I used an actual Jenni Bowlin butterfly this time, but sprayed it wish mist (thanks Diana for that idea!) and topped it with some Ranger Perfect Pearls (Claudine, again!). 

~butterfly detail~


I really hope you like my project and PLEASE come play along with us!!!  Just click on the links for each above!

I'm off to my craft room.  I'm in a creatin' mood now!

Heidi

Thursday, July 15, 2010

Let Your Dreams Fly

Once again this month we have Scrap That Poetry's poem debut coinciding with Sketchy Thursdays so of course I couldn't pass up the opportunity to blend them, especially since they were really rather complementary.


These pictures are from the last time I had my daughter professionally photographed.  She's 4 months in these pics...she's almost 5-years-old now.  Maybe it's time to get some more pics done, eh?

STP's challenge #20 poem is "Dreams" by Langston Hughes.  I chose to interpret the poem for my title "Let Your Dreams Fly". 

~flower trim detail pic~

Oh, that Webster's Pages flower trim is so dreamy!  And check out that frame.  It's from Pink Paislee and I have absolutely no idea what material it is made out of but it's gorgeous.  It's like super soft taffy that doesn't lose its shape.  It comes "naked", kind of a manilla color.  I sprayed it with some lime Maya Mist and rubbed a bit of it off so that the surface is just subtley green while much of the color pooled in the crevices. 

~pebble detail pic~

And how stinkin cute is that Prima pebble with the little bonneted girl? I layered it on top of a digi stamp flower from Digi Doodle Shop, this week's Sketchy Thursdays sponsor. There's another one in the picture below. On both I printed them out, colored them in with colored pencils, and sprayed them with some pearl Glimmer Mist.

~flowers detail pic~

Into my second week in the Claudine Hellmuth online techniques class and had to incorporate some newly acquired acrylic paint techniques.  Here I used watermark resist with an acrylic paint wash and acrylic paint stamping on some French text paper I got from Diana's etsy shop

~book page detail~

With the exception of the French paper, digi stamps, and the Webster's trim, everything on this layout is from the Ninja Addicts kit "Thrift Shoppe Junkie".  Such a gorgeous kit!!!

I would love to see you play along with us on both Sketchy Thursdays and Scrap That Poetry!!!

Off to check out what's in store for week 3 in the Claudine Hellmuth class, put some finishing touches on some other things I've made for it so far, and to enjoy the official last week of my son's summer vacation.  I think I may break out the huge roll of butcher paper today and see what they create. 

Heidi

Wednesday, March 24, 2010

R U Labeled?

Today's Pink Ninjas challenge is brought to you by the fabulous Miss Em!  Be sure to check out her Ninja Star interview!!  She's so much fun!! 

Prompt:  Labels
Technique:  Recycle some packaging
Pink Twist: Ribbon


Prompt: Labels...check!  Broke out the Dymo labeler (on the cassette) and my title itself.

~title detail~
Technique:  Recycle some packaging...check!  The whole project is made upon the sturdy cardboard sheet included with every Ninja Addicts' kit.  And that adorable dress form is cut out from some Barbie doll packaging.  Not sure if you'd consider the cassette tape recycled "packaging"...

Twist: ribbon...check!

~collage detail~
The background paper and the adorable little Kawaii cassette tape stamp are from this month's Torendi kit "Framed Cuteness". 

The paper is Mod Podged to the background.  I also used Mod Podge to shape and attach the tape from the cassette.  Make sure you check out the Torendi blog this Friday for your chance to win a cool Mod Podge sample pack from Mod Podge Rocks!  (And check out Mod Podge Rocks daily for super cool inspiration.)

Be sure to check out what the rest of the Ninjas made for your inspiration.  I swear every challenge I am blown away by the raw talent on this DT.  I am so honored to be included among this group.  In the immortal words of Wayne & Garth, "(I am) not worthy!" 

Have a great Wednesday!!!!

Heidi

Details:  Torendi "Framed Cuteness" kit paper & stamp; Making Memories paint; Glimmer Mist; Heidi Swapp alpha masks; Prima flower center; Deluxe Designs frame; Sharpie pen; Mod Podge matte; Michaels ribbon; Dymo labeler; cardboard, cassette tape, Barbie packaging. 

Monday, March 22, 2010

If I Could Bottle This I Would

Today we have a very happy, cheery color combo over on the Design Dollies to perk up your Monday:  black, white, and yellow.  Be sure to check out what the Design Team made for your inspiration. 


The flowers are fingerpainted and then stitched.  I love this self-portrait, the camera held at arm's length.  So funny! 

~closeup detail~


I used my Sketchy Thursdays April Guest Design Team sketch and even the prompt.  I did mist and paint, athough not pink as directed. 


The April GDT Challenge is closed but you can still hop on over to cast your vote for your favorite. 

Have a great Monday!

Heidi

Details:   Studio Calico stamp (coffee ring); Autumn Leaves Stampology ink; Making Memories paint; Maya & Glimmer Mists; Zig Millennium pen; DCWV cardstock; thread.

Wednesday, March 10, 2010

Sleeping In the Dog's Butt...Priceless!

Yeah, you heard me.  When you see the pic, you'll understand. 


I have been waiting for ages for the perfect inspiration to scrap this priceless moment!  Is it bad that I find this so hilarious?  You see, our dog has gotten very crotchety (is that a word?) in her advanced years and she will plop down wherever the hell she damn well wants to with blatant disregard for anyone else occupying said space.  My son's such a deep sleeper, he didn't even notice that the dog was practically sitting on his face while he was napping.  So, do you think I should've removed the dog from the situation like a good mommy or do you feel me that I ran for the camera instead??!!! 

Enter today's Pink Ninjas challenge:

Prompt - Priceless
Technique - Distress it!
Pink Twist - Paint

Oooooooh....this one's right up my alley!!

As seen in the August 2010 issue of Scrapbook News and Review magazine.


Gotta say, I'm likin this one very much if I may say so myself! 

1 impromptu nap on the couch by a heavy sleeping boy...


(Yum!  Loving those Prima flower centers!)

Plus, 1 stubborn dog with a favorite spot on said couch...


(Aren't those Basic Grey doggies just stinkin adorable??!!  And have you noticed my yellow paint's been getting a workout lately.  Not generally a yellow person except when it comes to the paint.  Hmmmm.  Notice I've swished in just enough pink paint to satisfy the challenge?  LOL.) 

Plus, 1 mom with a twisted sense of humor and a camera...


Priceless.  (Spelled out next to the cameras...I know it's hard to see in this tiny picture.)

Cuttlebugged the pic and then distressed it as directed. 

Been lovin all the ruler action Diana's been rockin lately so snuck in a ruler transparancy for good measure.  (Oh, REALLY!!  Seriously, I did not "pun" on purpose!  It just came out.  But I'm leaving it because it works.  And it's funny.  I crack myself up.)

Jump on over to the Pink Ninjas blog to see what the amazing Design Team made for your inspiration.  Awesome stuff!!!  You're going to love it! 

Please, please, pretty please come play along with us!  One lucky player will win something uber cool from Jennifer Priest of Hydrangea Hippo!!! 

/>

Check out her blog and etsy store!!!  And, Jennifer's just THAT cool that she's also offering all Ninja players free shipping for this entire month!!!!!  Check out THIS POST for details and your coupon code. 

Hope you have a cool day!

Heidi

Details:  Paper - My Mind's Eye, Imaginesce, Basic Grey; Teresa Collins transparency; Alpha Stickers - Cosmo Cricket, Making Memories; Prima flower centers; K&Company rhinestones; Making Memories paint; Zig Millennium pen; Cuttlebug embossing folder; sandpaper. 

p.s.  Don't forget that the Pink Ninja Addicts are sponsoring Sketchy Thursday's Guest Design Team Challenge this month!!!  Check out THIS POST for details.  (The "Three Little Birds" kit is up for grabs!!!)

p.p.s.  I'm so excited!!!  Lawn Fawn Stamps is officially open for business!!!!!!!  I can't wait for my "Sew Lovely" stamps to arrive!!!

p.p.p.s.  Didja notice that adorable cassette tape blinkie in my sidebar??  Just had to point it out because it's just so stinkin cute!!!  I want a cool blinkie for people to rock in their sidebars.  Go on!  Click it!  Check out Miss Allyson Joy!!!! 

p.p.p.p.s   (OK, yes, I'm quitting after this one!)  Check out this month's guest artist on the Pink Ninja Addicts, Kara Haupt.  This chick is wicked talented AND A HIGH SCHOOL STUDENT!  She is going to be one artistic force to be reckoned with, this one! 

~ fin

Wednesday, February 10, 2010

Handmade Ninja

Woohoo!!!  It's Pink Ninja Wednesday!!!!!!!!!!!

The new prompt is "handmade", technique is to use cardboard, and the pink twist is lace. 

I have to admit I was flummoxed by the "handmade" prompt.  I dont' really make anything what I'd term "handmade" other than papercrafts.  I don't sew or knit or anything like that.  As Mo so nicely put it, I just wasn't getting my mojo green light.  And then ~chorus of angels, bright glowing light, bluebirds soaring~ the Sunday Target ad arrived and my mojo was greenlighted!  They had an adorable piece of "art" on sale that inspired this layout:


I obviously didn't focus on something handmade but I featured something "handmade".  The heart is "faux handmade paper".  I've used this technique before on another Pink Ninjas prompt way back when.  You use paint and toilet paper to get that fiber-y handmade paper look:

~title detail~
I have to say I absolutely LOVE painting on cardboard!  It's become my favorite base.  And I've been hoarding pieces for a while now and have some great "interesting" pieces.  This one, for instance, has several holes in it which I love.

Hop on over to the Pink Ninjas blog to check out what the other Ninjas made for your "handmade" inspiration.  It's a regular craft fair over there!!!  Have I mentioned how honored I feel to be included in this amazing bunch of artists??  These chicks are off the hook!

Hope you have a happy hump day!

Heidi

Wednesday, January 27, 2010

Sheesh! Just Do It!

It's time for our next Pink Ninjas prompt.  This one is brought to you by our Ninja Star Christina.  If you missed it, click here to learn a little more about her.  She is so much fun!!!!!!

Prompt:  Personal Motto
Technique:  Stamping
Pink Twist:  Transparencies


I admit I was a bit stumped on this one at first.  I just couldn't think of anything new to do with a transparency.  And then the mojo gods smiled on me and brought me inspiration in the form of THIS awesome layout by Mme. Leah L'Orange herself!!  Transparency + gesso = happiness. 

So, I went to town on an old Creative Imaginations transparency I'd been hanging onto forever because I've been unsure how to put it all together.  Let me tell you, I will now be scouring my stash for all transparencies contained within (and there are a "few") because they're all getting painted and stamped and generally "piled upon"!!! Woohoo!!!


~back detail~
I began by masking taping down my picture and then just slathering on the gesso with a bit of pink, black, and yellow paint dribbled in.  Then I smooshed in some floss, dictionary scraps, and flowers.  I'm showing you the back of the transparency so you can see these added goodies as they only very subtly peek through on the front. 


I realized when I went to photograph this layout that it would be hard to visually demonstrate on the screen that the entire layout is on a transparency.  There are many areas where either the gesso is thin or not covering at all and I wanted to show that.  So I photographed the layout with two different cardstock backgrounds.  Above is with a black background, which I think looks best.  Below is with a hot pink background.  I think it makes the layout look too cloying and some of the pink paint gets lost on this background.  But I was torn which is actually the best.  Which do you think?


I'm a procrastinator at heart.  (Just ask any of my Design Team Coordinators!  I'm that DT member slipping in her layout 2 minutes before the deadline even though I've had the prompt for a month.  ~shake head~)

As my stamping says, I ponder, I ruminate, I list, I plan, I collect, I prepare...I just don't get anything done!!  I'm spending too much time preparing for Pete's sake!

~heart detail~


So I'm adopting a new personal motto:  Just Do It. 

~title detail~


This area that is covered with flowers actually said "LOVE" on the transparency.  See??!!  Another alterable discovery for my arsenal.  Woohoo!!! 

Head on over to the Pink Ninjas blog to check out what the rest of the Design Team made for your inspiration.  And let me tell you, you will most definitely be inspired by this batch.  There is nothing but incredible talent on this DT.  I am not worthy!!  But I sure am enjoying the ride!

Play along with us!  You don't want to anger any Ninjas do you??  ;oD

Have a great Wednesday!

Heidi

Details - Creative Imaginations transparency & bling; Making Memories paint; StazOn ink; EK Success & Tim Holtz stamps; Prima flowers & pearl bling; Heidi Swapp & Rhonna Farrer chipboard; DMC floss; unknown metal and brad alphas; gesso; vintage dictionary page.

Thursday, January 14, 2010

The Moment (Sketchy Thursdays)

I love this week's Sketchy Thursdays sketch:


And you will not believe what the DT made for your inspiration!  I love seeing the versatility of the sketches with the varied styles of the DT. 

So, I was just talking with a great friend recently who was excited that she may have just made her most fave layout ever.  And then I made my layout today for this sketch and well whadaya know!  I'm pretty sure this is MY most fave layout ever.  Good scrappin mojo transcends thousands of miles across the web!!! 


Last night I came across the Tyggereye Art Love blog and was so inspired by the amazing art that I practically dreamt about making this layout today.  I really had no idea how to go about it but just grabbed some cardboard and some paint and dug in. 

~picture detail~


Once I laid down the paint I stamped a bit, masked and misted a bit, and then finished it off with some pencil (partially around the painted hearts and alond the vertical stripes) and fingerpainted some areas.  I really have to say I'm impressed with how the background came out.  It looks like some cool patterned paper to me. 

~closer picture detail~
I covered the picture with some tuille to emphasize my rantings about identity lost in my journaling.  It's twisted and tied with wire in the corner with a charm displaying the date of the pic (which, incidentally, is sanded around the edges and fingerpainted with a silver glaze and some black paint).  What?  You say you don't see any journaling?  It's because it's on the back, silly! 


See, what I had to say, what this layout represents is how my life changed at that moment, at the moment we left the hospital with our little 5lb 3oz bundle and became forever new people.  And I don't necessarily want my kids reading the journaling so this is my way of hiding it. 


"This is the moment.  Oh, we didn't realize it at the time but looking back I now know.  The moment my identity was lost.  The identity I'd known.  I would no longer be autonomous. From this moment I am and will always be mom, mommy, mama...And how I'd longed and dreamt of and planned for those days.  But I never dreamed I'd sometimes cringe to hear those words.  And at first silently but now a bit more openly rage against that identity - or rather what that identity means.  That me.  I am lost.  It's no longer acceptable (although would it ever have been?) to make art for art's sake?  To make me happy.  Sane.  But then again, without you and all the moments you've hoisted upon me, would I want to create like this?  Explore me again (or for the first time?).  Truthfully, I can't remember "me" before and actually do believe you identified me.  The autonomous me.  I've never once NOT cherished and been thankful for you and what you brought to my life...And I never will not.  You created me and I love you.  Love, Mom, Mommy, Mama, Heidi"

Yes, a bit rambling.  Stream-of-consciousness.  I guess what I'm trying to get at is I need to create because of them - it just doesn't necessarily sound that way throughout, which is why I wouldn't want the kids to read it, KWIM? 

I'd love to see what you create with the rockin sketch.  Hook up your art to Mr. Linky in the Sketchy Thursdays sidebar for your chance to win the Unity Stamp Co. October Store Kit from Sweet Scrap Deal!


Oh, I so wish I had this kit.  It is wonderful...

Thanks for letting me ramble and rage and display my sometimes yellow mommy colors. 

Have a great Thursday!

- Heidi

Details - Making Memories paint & glaze; Glimmer Mist; Heidi Swapp mask; AMM charm, Stamps - {ippity}, Delish, Autumn Leaves; Stampin' Up! ink; pink tuille from Ninja Addicts Three Little Birds kit; Zig Millennium pen; pencil; cardboard; unknown wire.

P.S.  Check out today's post on the Cosmo Cricket blog.  Not only is it chock-full of yummy sneak peeks for some of their new lines but they're holding a contest...comment on your fave LSS or online independent store.   The winning store will receive a whole line and the winning commenter will also receive it.  Let's give torendi.com an awesome shout-out!!!!!