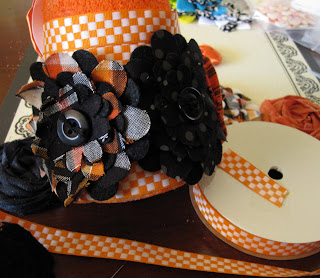
This is a tutorial that was originally included in the Scrapbook News and Review Magazine Halloween newsletters a few weeks back. Be sure to sign up to receive the SNR newsletters...they're chock full of tips, eye candy, and sometimes tutorials!
Supplies Flowers: Precocious Paper; Paint: Plaid; Styrofoam: FloralCraft; Other: pins, ribbon
This is a fun, easy and versatile idea for a holiday decoration. I say versatile because you can switch out the flower colors and patterns by season if you only temporarily attach the flowers.
Begin by gathering a few supplies:
- Styrofoam cone (9” shown)
- A variety of fabric flowers in various sizes (18 used, from 1” – 3”)
- Paint in a complementary color
- Ribbon in a complementary color/pattern
- Pins
Paint your cone with a color complementary to your flowers. I do this so that if any of the cone ends up showing through after the flowers and ribbon are attached it won’t be so noticeable.
Starting at the bottom of the cone, attach the largest flowers with pins to create the first row, lining up the petals with the bottom of the cone. Overlap the flowers slightly. So that the pins won’t be visible, hide them by inserting into folds of fabric or by lifting topmost petals and inserting through lower petals. For this particular 9” cone, I used five 3” flowers for the bottom row.
After the bottom row of flowers is attached, wrap coordinating ribbon around the bottom, underneath the flowers, to hide any large gaps. Attach the ribbon with pins also, hiding the pins underneath the flower petals. Repeat by wrapping ribbon just above the flower row, tucking it under the petals and securing with pins.
Continue alternating rows of flowers and ribbon from the bottom up, overlapping flowers slightly. To finish the tree, attach a small flower to the very top and sprinkle additional smaller flowers throughout, covering up any large gaps.
I like to use pins to attach the flowers because I can easily readjust the flowers as I go along. And, after the holiday decorations are taken down, I can easily remove the flowers and reuse them on layouts commemorating that holiday. Plus the cone is now ready to be decorated with the next holiday’s flowers.
If you would rather make a more permanent decoration, simply attach the flowers with glue using a hot glue gun.
This is such a simple and quick holiday project that it’s a cinch to make several at a time. You can easily create an attractive display with trees of different sizes, colors and patterns.
I am so grateful I get to share what I love doing with all you awesome people out there in bloggy land!!! Thank you so much for stopping by!!


Sooooooooooooooo cool Heidi! I need to make one for Christmas! :):):):):):):):):):):):):):):):):):):):):)
ReplyDeleteI abosolutely love this, Heidi! I'm with Julie - I need to make one for Christmas!
ReplyDeleteWow! Absolutely love this! Beautiful fall colors, loving those flowers! Thanks for sharing!
ReplyDelete